
Introduction
The star-studded, moon-lit canvas of the night sky has always been a fascinating sight to behold; and capturing this enchanting spectacle through the lens is what night photography is all about.
Unlocking the Magic of Night Photography with Long Exposures
Importance of Night Photography
Night photography offers a wonderful opportunity to see and capture the world in a different light – literally. Starry night stock photos, cityscapes awash with neon lights or even moonlit landscapes, all add a unique charm and creative touch to a photographer’s portfolio.
Overview of Long Exposures
Long exposures play a fundamental role in night photography. This technique involves leaving the camera’s shutter open for a prolonged period, allowing more light to hit the sensor, which results in stunning night photos brightly lit up, creating truly magical imagery.
Understanding the Basics of Long Exposures
Definition of Long Exposure Photography
Long exposure photography, in simple terms, is a photographic technique that involves leaving the camera’s shutter open for an extended period. This captures movement within this period, allowing light traces to paint onto the sensor or film. The result? Stunning starry night stock photos and images that seem magical and ethereal.
How Long Exposures Work in Low Light Conditions
To achieve starry night images, you need to understand how long exposures work in low light. In low-light conditions, your camera needs more time to absorb enough light to produce a clear and sharp image. A longer exposure time allows more light to hit the sensor, capturing a greater level of detail. Here’s how it works:
-
Setting the camera on a tripod for stability
• Using a remote trigger or self-timer to avoid camera shake
• Lowering the ISO to minimize noise
• Increasing the exposure time to capture more light By mastering these, you’ll be well on your way to capturing stunning night photos with long exposures.
Equipment Needed for Long Exposure Photography
Before delving into the magnificent world of night photography with long exposures, it’s crucial to ensure you’re armed with the right equipment.
Camera requirements
Firstly, you’ll need a camera that allows you to manually override settings. The capability of adjusting shutter speed, aperture, and ISO is fundamental in long exposure photography. Both DSLR and mirrorless cameras with these settings will do the trick.
Tripod and stability
Secondly, say hello to your new best friend – the tripod. When it comes to capturing stunning night photos, stability is everything. A sturdy tripod will ensure your camera stays perfectly still during the lengthy exposure times, eliminating any chance for blurry or shaken images.
Remote shutter release or timer
Lastly, having a remote shutter release or self-timer is crucial. This little gadget allows you to trigger the shutter without physically touching the camera, hence minimizing any chances of inadvertent movement or camera shake. If your camera doesn’t have a built-in timer, you can easily find an affordable remote shutter release online. With these pieces of gear, you’re well on your way to creating starry night images as captivating as Van Gogh’s Starry Night!
Setting Up Your Camera for Long Exposures
Captivating night photography could be somewhat challenging to perfect, but with the right settings and a little practice, you’re just a few shutter clicks away from creating your dazzling starry night images.
Choosing the Right Shooting Mode
When diving into night photography, you want to have as much control over your camera as possible. Hence, it’s best to opt for manual (“M”) mode. This mode will allow you to freely adjust all the crucial settings – ISO, aperture, and shutter speed, among others.
Adjusting ISO and Aperture Settings
You’ll make these modifications to achieve long exposures:
* Set your ISO to a low setting. While higher ISO settings make your camera more sensitive to light, they also introduce more grain or noise. Aim for an ISO of 100 or 200.
* Decide on your aperture depending on the depth of field desired. If you want everything in focus, go for a higher f-number like f/11 or f/16.
Understanding the Shutter Speed
Lastly, adjusting the shutter speed is pivotal to master the art of long exposures. A longer shutter speed allows more light to reach the sensor, which is ideal for capturing stunning night photos. For starry night stock photos, anything from 15 seconds to 30 seconds usually works. Remember, the slower the shutter speed, the longer your exposure will be. Just go ahead, practice with different settings, and watch the magic happen in your night-time photography!
Composing Your Night Photographs
Photographing the night sky is a lovely and fascinating endeavor. The composition of your picture can make or break the overall impact and, that’s where some thoughtful planning can make a monumental difference.
Choosing a captivating subject
Adding interest to a night sky full of stars can be as simple as choosing a captivating subject. This can be a striking natural feature like a mountain range or an elegant, old building that stands against the dark sky artistically. Illuminating your chosen subject with some soft light from your torch or off-camera flash can also add to the drama.
Framing and composition techniques
While the standard rules of thirds apply, night photography begs for a bit more creativity:
-
Position your subject off to one side rather than in the center for a dynamic, visual interest.
• Play with perspectives to create some mesmerizing shots. A low angled shot of the night sky over a calm lake can create jaw-dropping reflections.
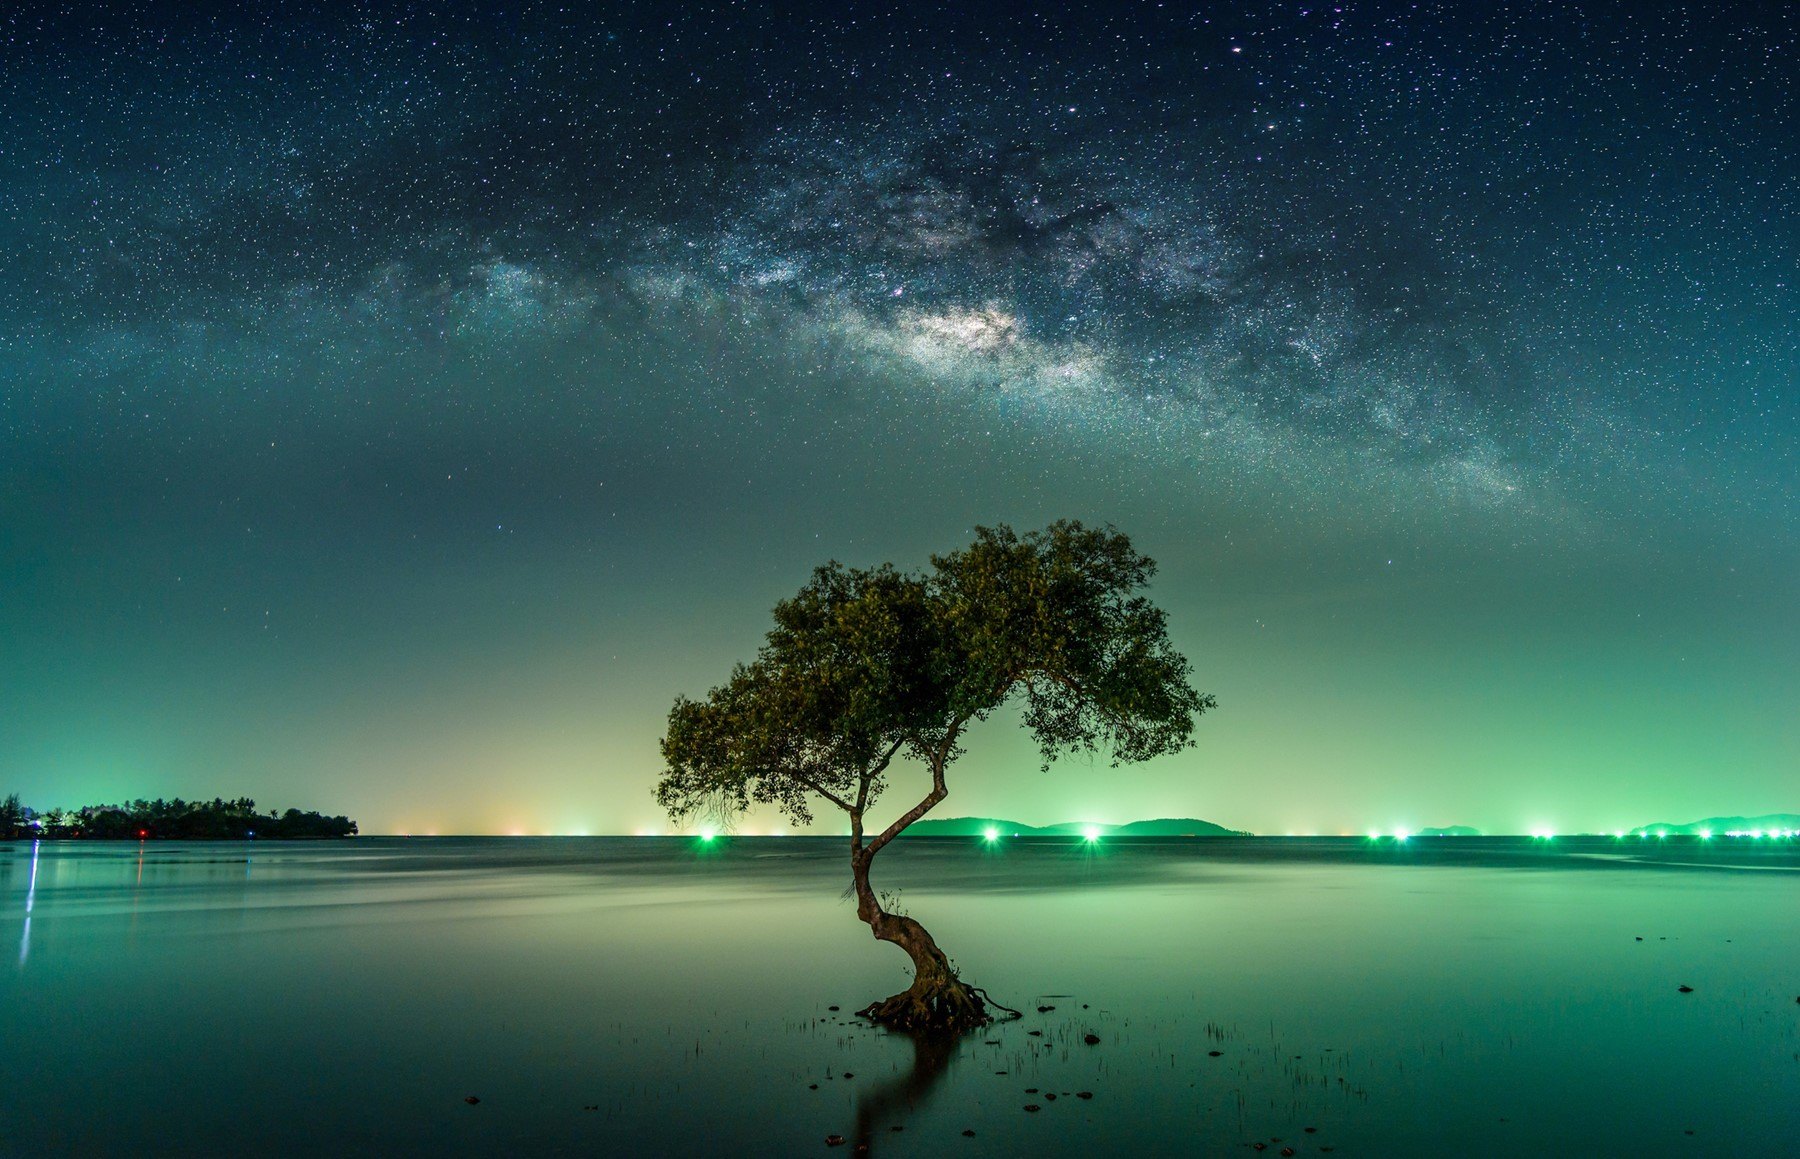
Incorporating foreground and background elements
Incorporating foreground and background elements in your frame tends to generate a sense of depth. Including something in the foreground, like a gnarled old tree or a pile of rocks, lights up under starlight, adds texture to your photographs and enchants the viewer’s eyes. Similarly, adding a silhouette of a far-off mountain range or a faint city skyline in the background will establish the context of your shot. Not to mention, it can create some stunning landscape-night hybrids. Remember, it’s all about achieving that beautiful balance that leaves your viewer enamored.
Techniques for Capturing Long Exposures
Long exposures can transform your night photography into an exquisite art form, and as you learn the relevant techniques, you’ll quickly find yourself creating stunning night photos that leave viewers enchanted.
Using Bulb Mode for Longer Shutter Speeds
Bulb mode is an incredible feature that most digital cameras have incorporated. By using this mode, you can control the shutter speed manually, allowing it to remain open for as long as you desire. This feature is perfect for capturing starry night images, filled with celestial beauty and twinkling brightness.
Panning and Zooming Techniques
Another excellent technique involves the use of panning and zooming. Essentially, while your camera’s shutter is open, you gently move the camera or lens. This action creates a sense of motion in your photos. Soft movements can result in blurred, artistic effects, while sharp, quick movements can create starry night stock photos with dynamic streaks of light.
Creating Light Trails with Moving Subjects
Finally, moving subjects can become your most powerful tool. By keeping your camera steady and allowing your subject to move through the frame, you create breathtaking light trails. This technique works perfectly with cars, people with flashlights, or even the heavenly bodies themselves! It’s an excellent way to breathe life into your night photography and create images that are truly unique.
Working with Light Sources in Night Photography
When venturing into night photography, the available light becomes your greatest ally. There are both natural and artificial light sources you can utilize to illuminate your scene and create an enchanting atmosphere.
Utilizing Natural Light Sources
Even at night, many natural light sources can enhance your photos. The moon, for instance, can be a striking source of illumination, providing just enough light to accentuate your subject softly. Likewise, stars offer distinct points of light that highlight the enormity of the night sky, particularly when captured using long exposures. Look for opportunities to incorporate these lights into your compositions, such as creating star trails or capturing the moonlit landscape.
Experimenting with Artificial Lighting
Artificial light also offers a vast range of possibilities. Street lamps, neon signs, and city skylines after dark all provide different colors and intensities of light that can give your photographs a unique mood. You can use a long exposure to create light trails from moving cars, or to transform cityscapes into stunning abstract images.
Long Exposure with Fireworks or Sparklers
Long exposure night photography can be especially exciting when playing with elements like fireworks or sparklers. These light sources not only illuminate the darkness but can leave intricate trails across your frame, giving a sense of motion and energy. Remember to adjust your camera settings accordingly to capture these fleeting moments without overexposing your image. With the right approach, you can turn the night into your canvas, filled with vibrant light paintings.
Overcoming Challenges in Night Photography
Photographing the night sky is a beautiful endeavor, but one that comes with its own set of unique challenges. Here, we’ll walk you through these obstacles and provide advice on how to overcome them.
Dealing with Noise in Low-Light Conditions
The quiet tranquility of a night sky can often be marred by digital noise. This infuriating speckling usually appears when shooting in low-light environments like starry nights. Try reducing your camera’s ISO setting and enabling in-camera noise reduction. Also, remember to shoot in RAW format, providing you with a larger color range to work with when buffing out noise in post-production.
Handling Difficult Lighting Situations
One of the hardships of night photography is dealing with minimal or uneven lighting. A trick to combat this is to use a longer exposure time, allowing your camera’s sensor to capture more light. Additionally, you can make use of:
-
The rule of 500, which can help ascertain the optimal shutter speed before stars start to blur.
• Manually adjusting aperture and ISO to strike a balance between light input and noise level.
Correcting Color Cast in Post-Processing
Color correction is often necessary when the night sky has an unnatural tint due to light pollution or certain camera settings. Using post-processing tools like Adobe Lightroom or Photoshop, you can adjust the photo’s white balance for the most natural rendering of starry night colors. Remember: practice makes perfect, experiment to understand what works best for you.
Tips for Achieving Stunning Night Photos
Night photography can seem challenging, but with a few strategic moves and a sprinkle of creativity, you can create spectacular starry night images that enchant and impress. Here are a few essential tips to get you started!
Finding the Best Time for Night Photography
Believe it or not, timing is everything in night photography. Start by planning your shoots around the “blue hour” – the period shortly after sunset or just before sunrise, when the sky has that magical, deep blue hue. Combine this with proper long exposures, and you’ve won half the battle for capturing stunning night photos.
Exploring Different Locations and Perspectives
Experiment with various locations – from wide-open fields to cityscapes – each offering unique opportunities to capture night’s beauty. Pay attention to perspective too. Try low angles, high vantage points, or even reflections in water bodies – different perspectives can dramatically change the visual appeal of your starry night stock photos.
Experimenting and Embracing Creativity
Finally, don’t be afraid to experiment. Play around with long exposures; it can lead to exciting effects like light trails, star trails, or perfectly illuminated landscapes under moonlight. Creativity is the final ingredient to mastering the art of night photography. So, let your imagination run wild – the night sky is yours to capture!
Enhancing Night Photos through Post-Processing
Pulling the magic out of your long exposures doesn’t stop when you press the shutter button. Post-processing is a vital and exciting part of creating stunning night photos. It allows you to refine the details, contrast and color range to truly capture and represent the beauty of the nightscape.
Basic Adjustments in Exposure and Contrast
Twisting knobs in the quiet solitude of a starry night can be a unique experience, but don’t forget about adjusting your exposure and contrast once you’re home. This step gives images depth and helps to highlight unique features of the landscape or sky.
* Adjust the exposure to add more brightness to your photo.
* Increase the contrast to deepen the blacks and make the colors more vivid.
Removing Unwanted Elements
Don’t let unwanted elements detract from the beauty of your image. Use the clone or healing tool in your editing software to remove distractions like airplane trails or lens dust particles.
Enhancing Colors and Details
Lastly, let’s talk about color and clarity. These final touches can really make a starry night image pop.
* Boost saturation or vibrancy to breathe life into your colors.
* Increase sharpness or clarity to enhance the details of the stars and the landscape. With these tips in your toolkit, you’re well on your way to mastering long exposure night photography. Enjoy the journey and the magical moments your camera captures.
Images via Dreamstime.com
Showcasing Your Night Photography
Unlocking the magic of long exposures and night photography doesn’t have to end with the click of the shutter. Showcase your stunning starry night images to the world!
Sharing Your Work on Social Media Platforms
Social media platforms are a fantastic place to share your night photography with a global audience. Platforms such as Instagram, Facebook, and Pinterest can provide a significant reach. Here are some tips to make your presence felt:
– Post regularly and consistently.
– Use relevant hashtags like longexposure, nightphotography, and starrynight on your posts.
– Engage with your followers by responding to comments and messages.
Entering Photography Contests and Exhibitions
Boost your exposure and credibility by submitting your night photos to photography contests and exhibitions. Not only does it give you an opportunity to win prizes, but it also helps you compare your work with other photographers, posing an excellent learning opportunity.
Building an Online Portfolio
An online portfolio is more than just a collection of your work; it’s your visual resume. Showcase your best long exposure night photos along with descriptions or stories about the pictures. Remember, your portfolio should be a manifestation of your style, technique, and skills.
Conclusion
Recap of key tips and techniques
As we dim the lights on our discussion of night photography, let’s recap on the noteworthy techniques we’ve explored. We’ve learned how to effectively use long exposures to capture crisp, surreal images after sundown, taking the mystifying night sky and turning it into our canvas. Remember these key points:- Use a tripod to stabilize your camera for the perfect shot.
– Experiment with different shutter speeds and ISO settings.
– Your camera lens is paramount; a wide aperture lens can make a huge difference.
– Always use manual focus when capturing starry night images.
Encouragement to practice and explore night photography
Photographing the night sky is no child’s play but with practice, patience, and experimentation, you will soon be well on your way to mastering it. I encourage you to push yourself outside of your comfort zone, venture into the night, and keep exploring different photography techniques. You might just surprise yourself!
Inspiration to unlock the magic of night photography with long exposures.
The inky black canvas that is the night sky is waiting for you to reveal its secrets. Create stunning night photos, capture starry night stock images that awaken the imagination, and open the door to a whole new world of night photography with long exposures. Start wielding the magic of the night with your lens today!